TP-Link EAP225-Outdoor Access Point: Setup and Configuration Guide
If you need strong and reliable WiFi in outdoor areas like gardens, campuses, warehouses, or offices, the TP-Link EAP225-Outdoor Access Point is a great solution. It is designed to handle weather conditions while delivering stable internet over a wide area.
In this complete guide, you’ll learn how to set up, configure, and optimize your TP-Link EAP225-Outdoor access point step by step.
What is TP-Link EAP225-Outdoor Access Point?
The TP-Link EAP225-Outdoor is a weatherproof wireless access point designed for outdoor use. It connects to your existing network and provides extended WiFi coverage.
Key Features
- Dual-band WiFi (2.4GHz and 5GHz)
- Weatherproof (IP65-rated) design
- Long-range coverage
- Supports multiple users
- Centralized management with controller software
Where Can You Use It?
This device is ideal for:
- Outdoor homes and gardens
- Schools and campuses
- Cafes and restaurants
- Warehouses and factories
Things You Need Before Setup
Before starting, make sure you have:
- Internet connection from your router
- Ethernet cable
- PoE (Power over Ethernet) injector (usually included)
- A laptop or smartphone
- Access to a web browser
How to Setup TP-Link EAP225-Outdoor Access Point
You can set it up in two ways:
- Standalone (via web browser)
- Using controller software (Omada Controller)
Method 1: Standalone Setup (Web Browser)
This is the easiest method for beginners.
Step 1: Connect Hardware
- Connect the access point to the PoE injector
- Connect injector to your router using Ethernet cable
- Power on the device
Step 2: Connect to Device
- Connect your PC to the same network
- Ensure the access point is powered on
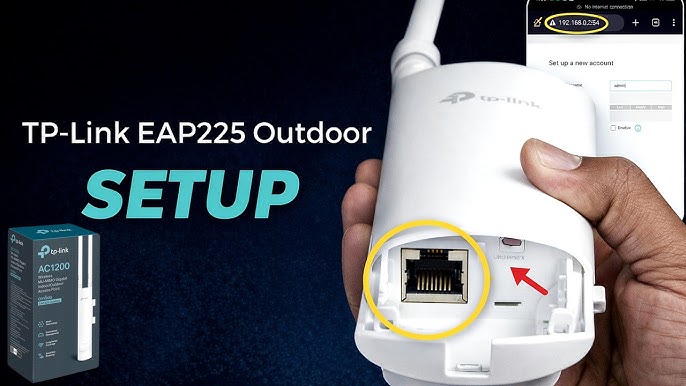
Step 3: Open Login Page
Open your browser and enter:
Step 4: Login to Admin Panel
- Default username: admin
- Default password: admin
Create a new password when prompted.
Step 5: Configure Wireless Settings
- Go to Wireless Settings
- Set your WiFi name (SSID)
- Choose security type (WPA2/WPA3)
- Enter a strong password
- Save settings
Method 2: Setup Using Omada Controller
For advanced users or multiple access points, use TP-Link Omada Controller.
Benefits of Omada Controller
- Centralized management
- Monitor multiple devices
- Advanced network control
- Remote access
Steps:
- Download and install Omada Controller
- Launch the software
- Add your access point
- Follow on-screen setup wizard
- Configure SSID and network settings
How to Mount the Access Point
Proper installation improves performance.
Mounting Tips:
- Install at a height (wall or pole)
- Keep it in open space
- Avoid obstructions like walls or metal
- Ensure proper cable protection
Important Configuration Settings
After setup, you can customize:
1. Wireless Mode
- Enable both 2.4GHz and 5GHz
- Use 5GHz for faster speed
2. Channel Selection
- Choose less crowded channels
- Avoid interference
3. Guest Network
- Create separate WiFi for visitors
- Protect your main network
4. Band Steering
- Automatically shifts devices to better band
Troubleshooting Common Issues
1. Cannot Access Login Page
Fix:
- Check network connection
- Use correct IP (192.168.0.254)
- Restart device
2. Weak Signal Outdoors
Fix:
- Adjust placement height
- Avoid obstacles
- Check antenna direction
3. No Internet Connection
Fix:
- Check router connection
- Verify cables
- Restart all devices
4. Device Not Showing in Controller
Fix:
- Ensure same network
- Reset access point
- Update firmware
How to Reset TP-Link EAP225-Outdoor
If something goes wrong, reset the device.
Reset Steps:
- Press and hold reset button for 10–15 seconds
- Wait for device to reboot
- Reconfigure settings
Security Tips
To keep your network safe:
- Use strong passwords
- Enable WPA2/WPA3 encryption
- Disable unused features
- Keep firmware updated
Pro Tips for Best Performance
- Install in central outdoor location
- Use shielded cables for long distances
- Avoid placing near electrical interference
- Regularly monitor performance
FAQs
1. What is the default IP of TP-Link EAP225-Outdoor?
The default IP is 192.168.0.254.
2. Can I use this access point indoors?
Yes, but it is mainly designed for outdoor environments.
3. Do I need Omada Controller for setup?
No, you can use standalone web setup. Controller is optional.
4. How far does the signal reach?
It can cover large outdoor areas, depending on placement and environment.
5. What should I do if I forget login password?
Reset the device and set it up again.
Conclusion
The TP-Link EAP225-Outdoor Access Point is a powerful solution for extending WiFi coverage outdoors. With easy setup options and advanced features, it is suitable for both beginners and professionals.
By following this guide, you can quickly set up and configure your access point, fix common issues, and enjoy stable internet in outdoor spaces.
Proper installation, correct settings, and regular maintenance will ensure the best performance from your device.